had the great pleasure of working with the blythewood youth baseball and softball league to create their 2017 all star banner for their minors team. great group of coaches and players. go get'em boys!

teenage mutant ninja turtles
i had so much fun this summer creating designs with expressions vinyl that i had to do some more. i took my 6 year old son to see TMNT this summer, yes it's rated PG13 but i thought i would give it a shot. we didn't make it through the whole movie, he got scared and i wasn't going to force him to watch it. i think he could have made it and saw it all turned out ok. at any rate, he has been a fan of the turtles without really knowing much about them. i thought it would be a fun idea to make some shirts. he loves all the turtles so i couldn't pick just one. i, of course, turned to expressions vinyl for help, they have a great selection of colors and i knew i would be able to find lots of different greens. below was my material list. i also turned to another local company that has been helping me find what i need lately, eat more tees, again i knew i could find a variety of greens. like people no two turtles are the same, right?
12 x 12 sheets of heat transfer vinyl (i like the EasyWeed)
red
purple
orange
sky blue
12x 24 sheets of heat transfer vinyl
2 green
2 black
2 yellow
2 lime green
i used gildan t-shirts in
military green
kiwi
forest green
irish green
i used mostly the same process as i did this summer for the monsters t-shirts. here s a link back to that post for reference.
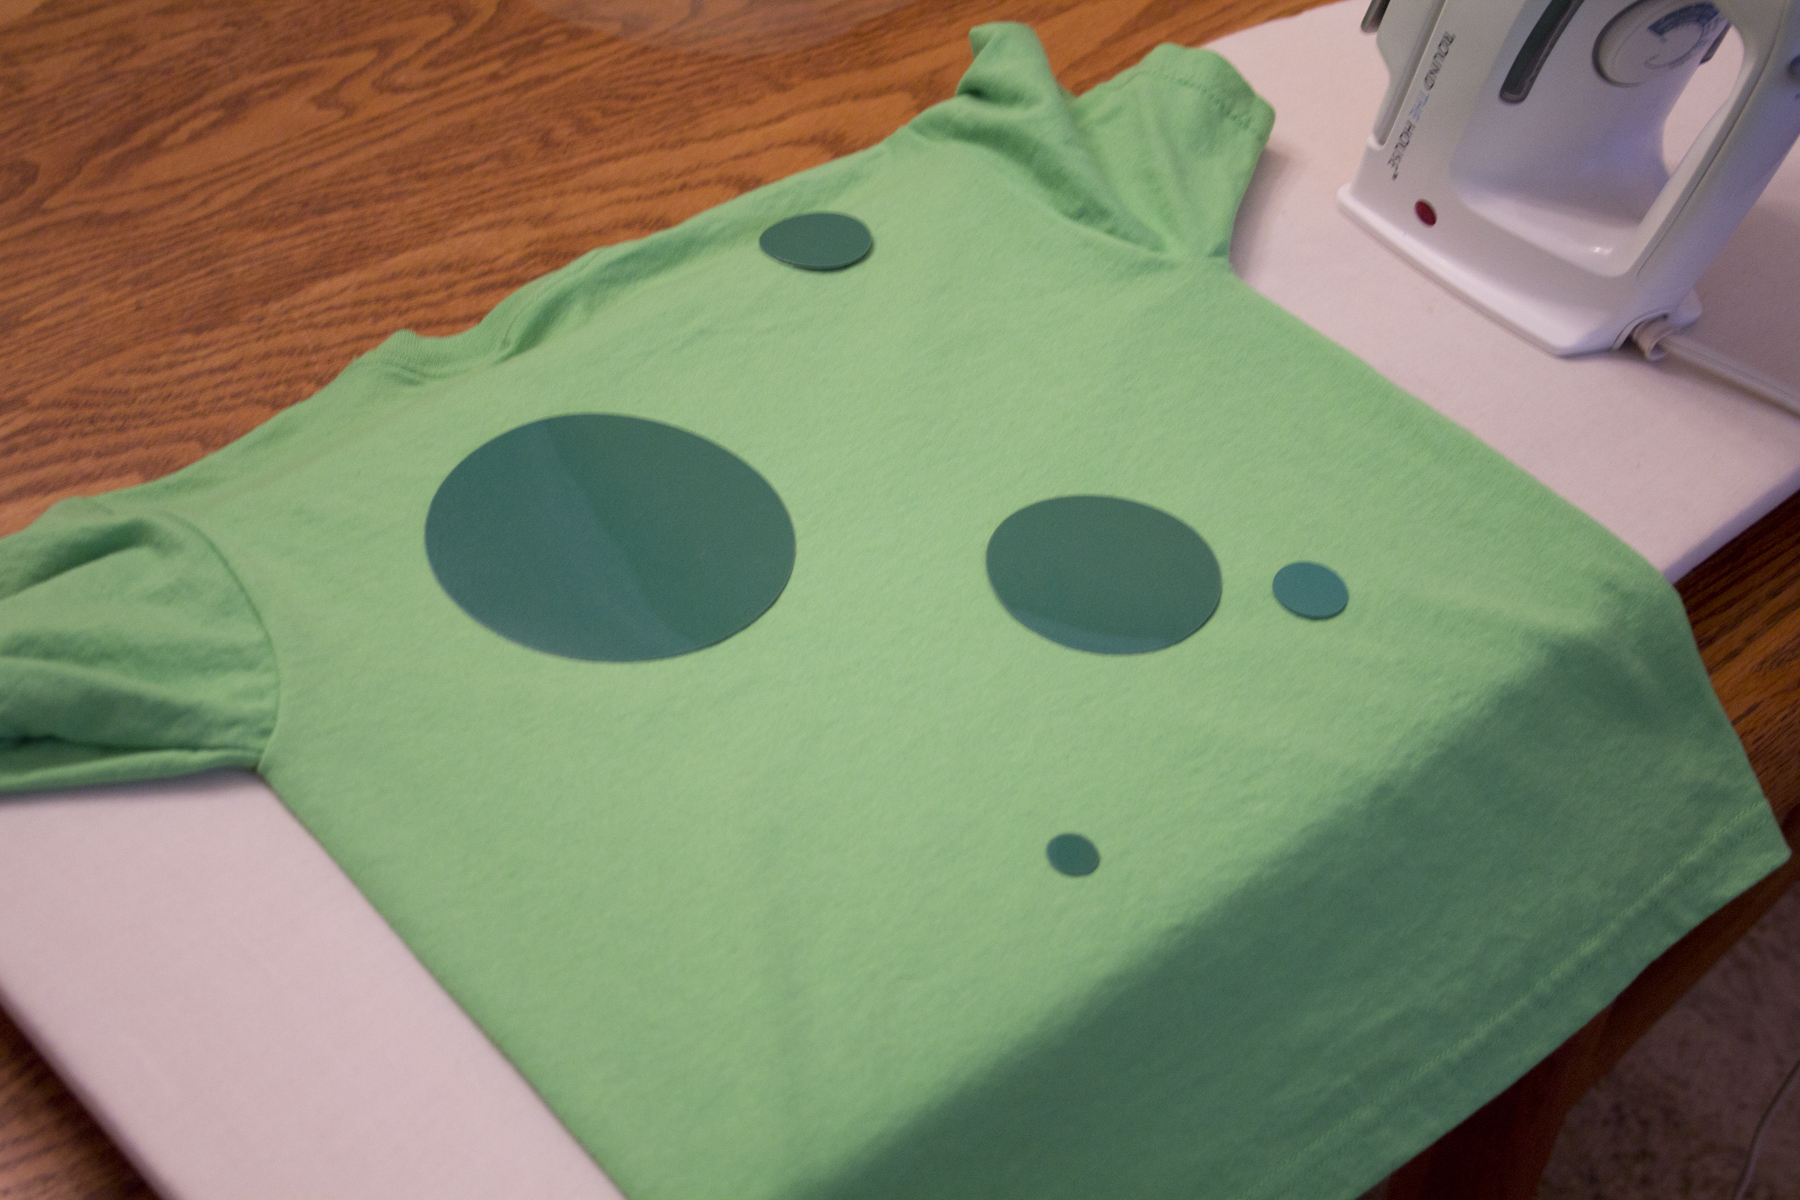
i first start by drawing out my designs using adobe illustrator. i also use a wacom tablet. i design the whole thing and then break it apart into the colors which i will cut on my silhouette cameo. so this is where i start. i started with the shells being back of the shirts.
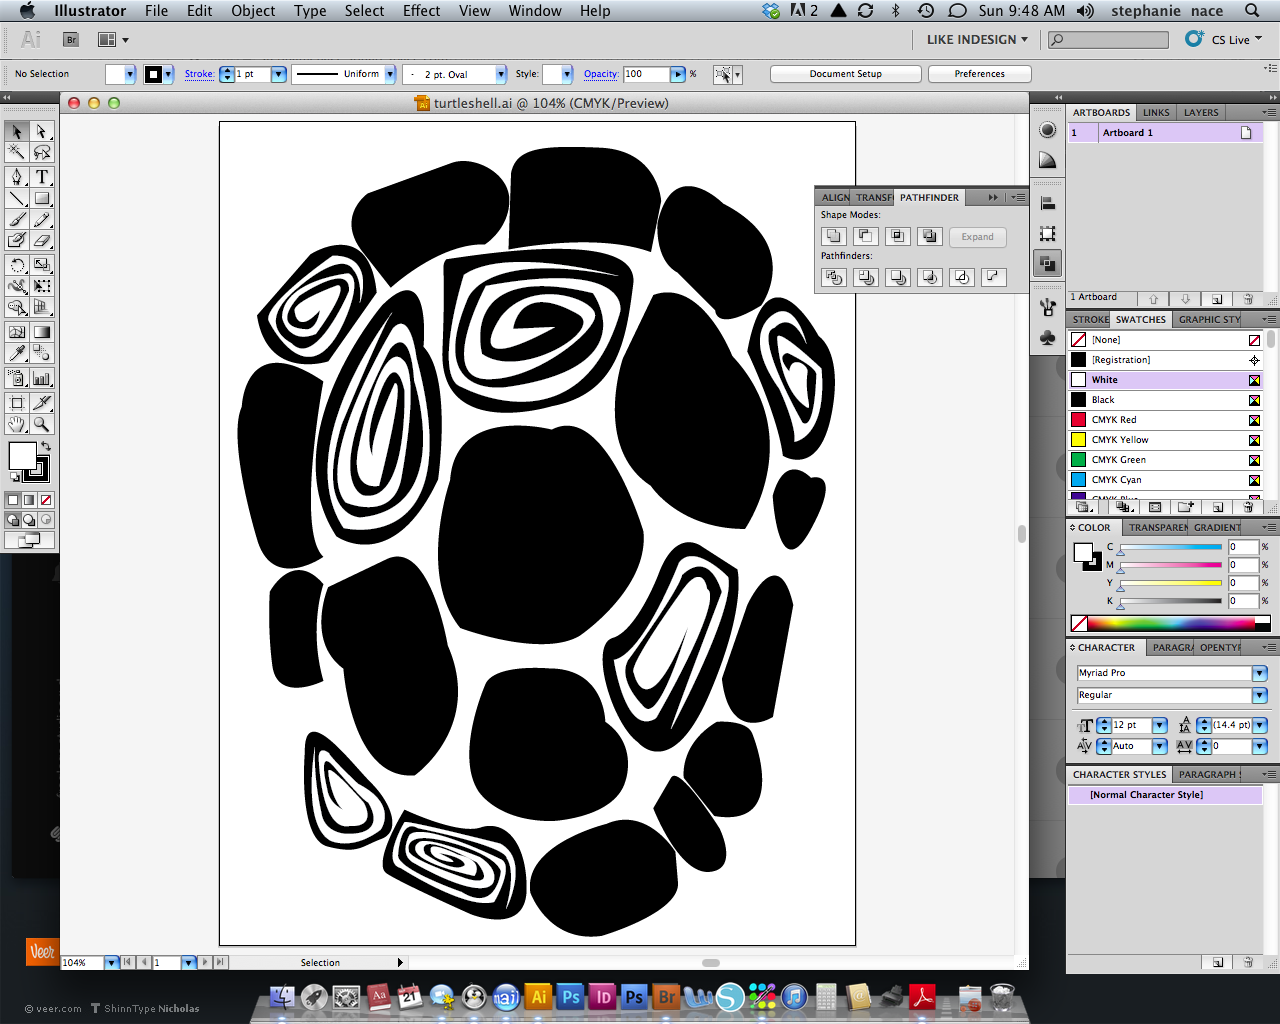
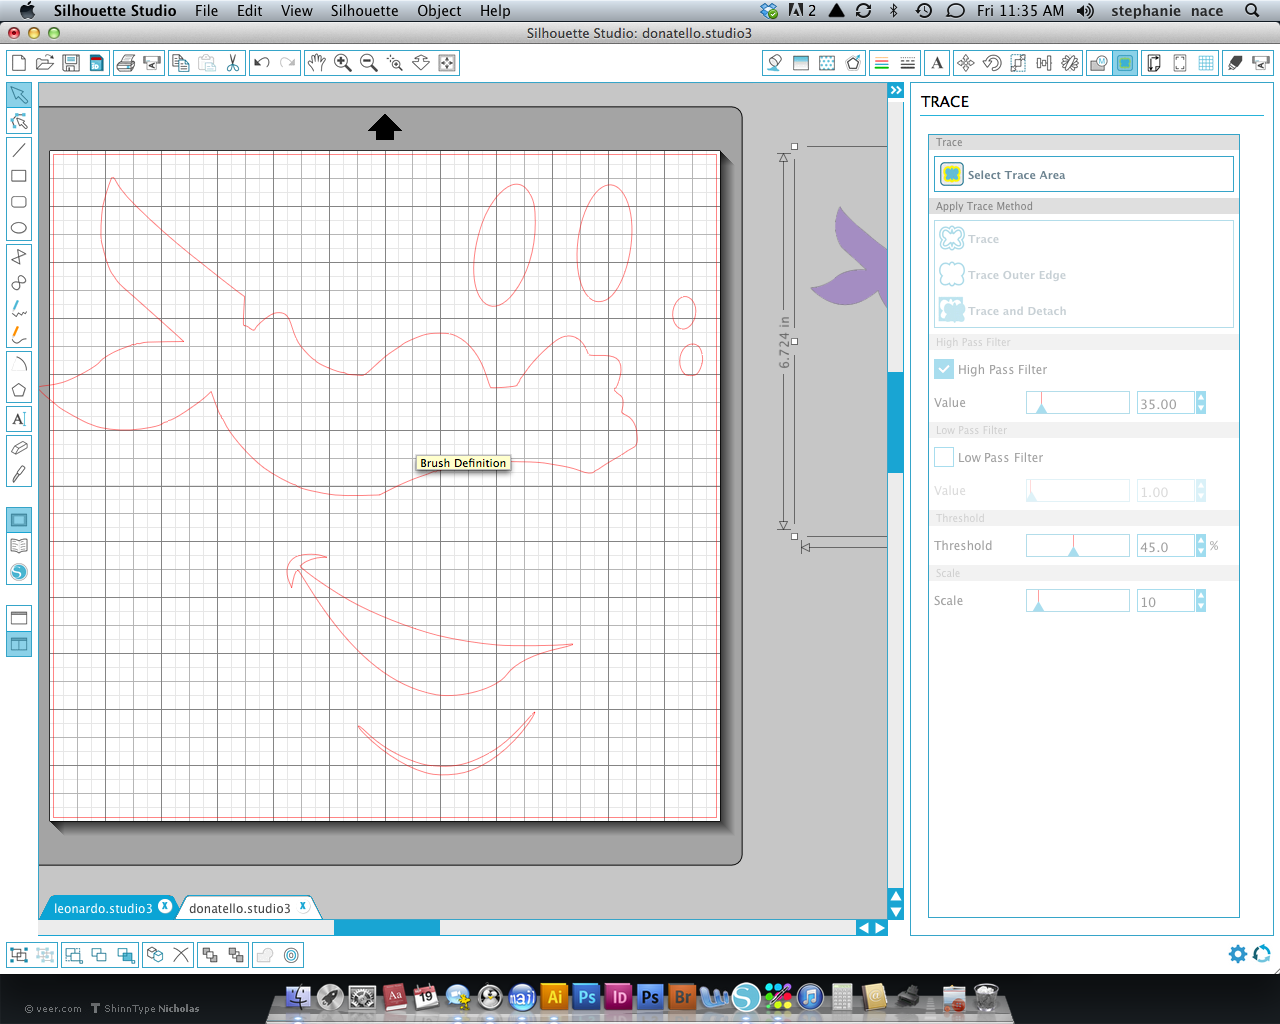
i knew that the shell would be made of 3 layers, outer shell color, inner shell color and accent swirls. once i separate them, i save each part as a .png in illustrator and open it in silhouette studio in order to trace them and cut them out.

this is the shell in silhouette studio. the right side is the large shell to be cut in one color, on the left a slightly smaller version to be cut in another color. the swirls are not shown yet.
once the pieces are cut i start constructing the t-shirts. in the examples below, i switch between shirts but the process is all the same for each shirt.

these are the original t-shirt colors without designs.

bottom layer cut in black
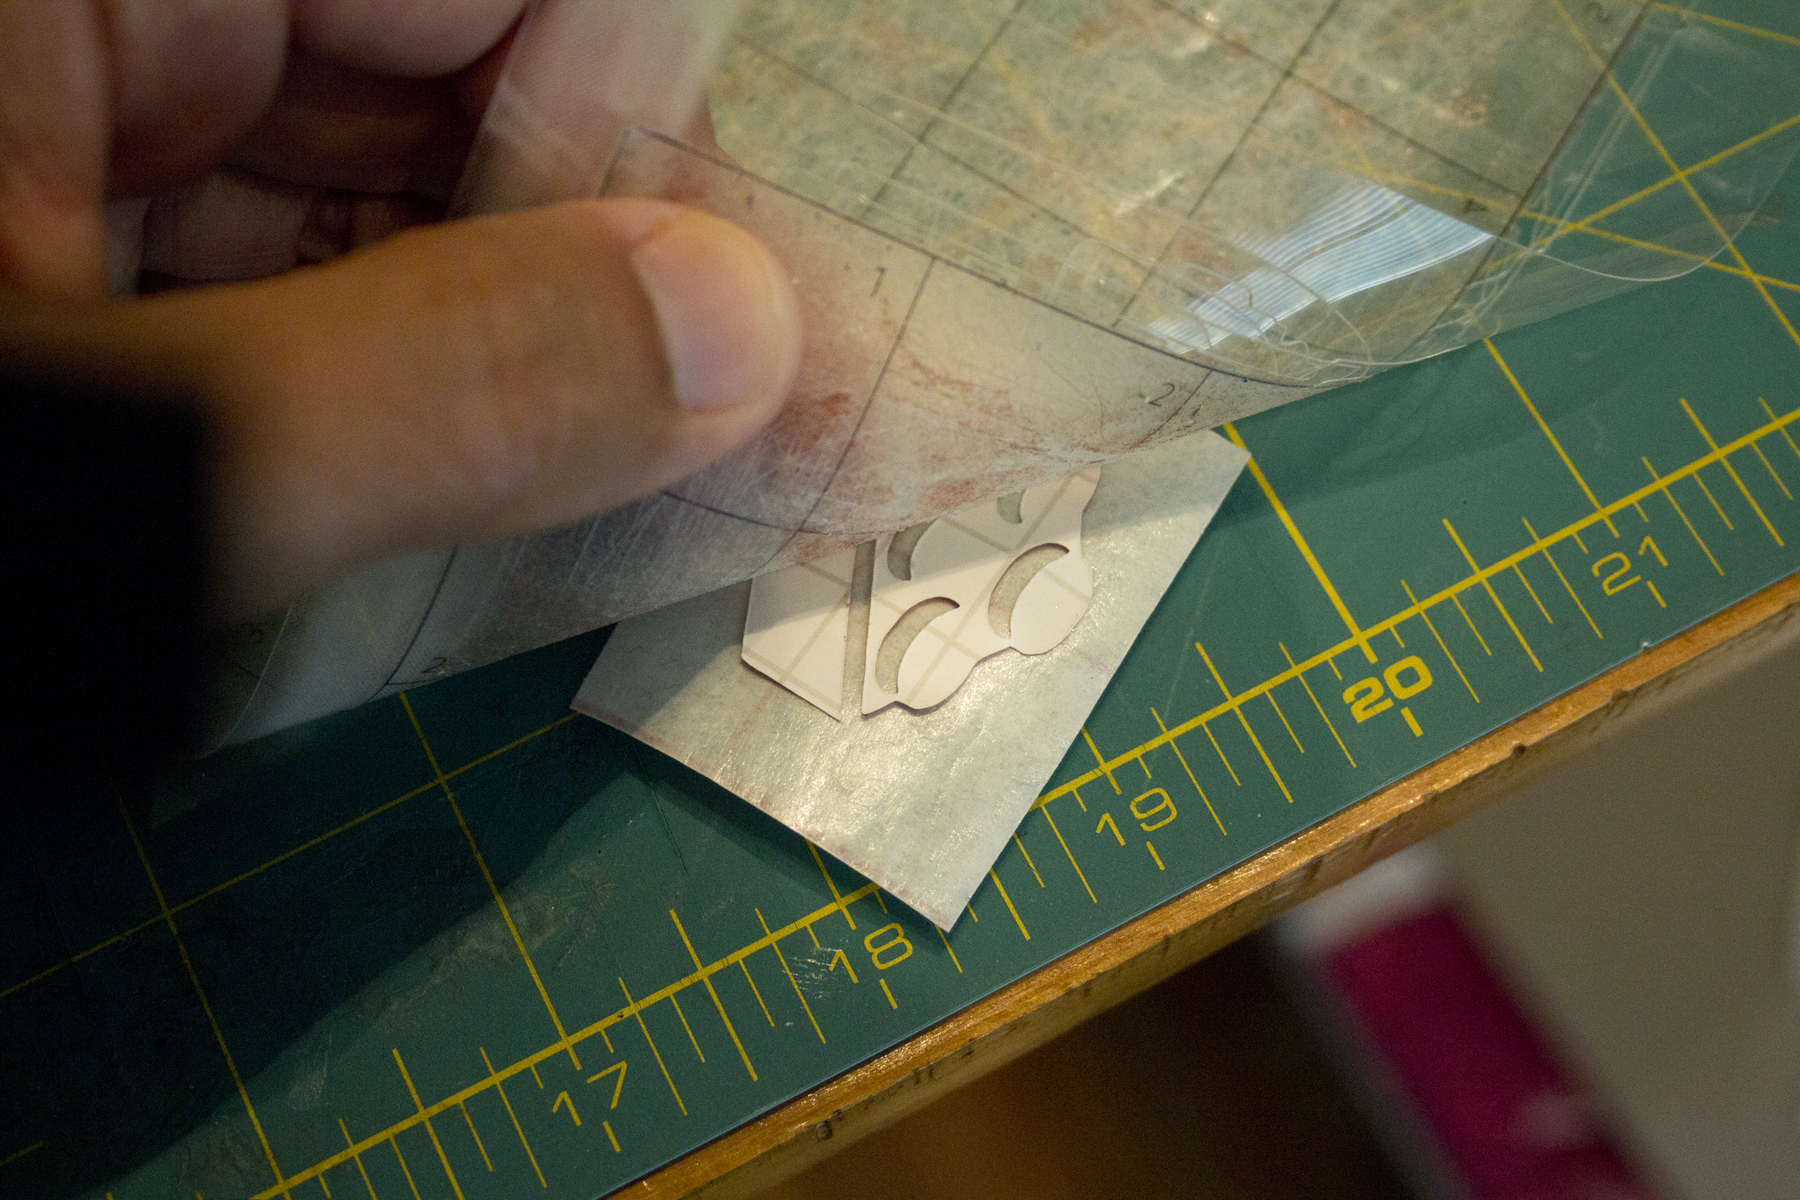
i like to use the transfer tape in order to pick up my designs and keep the spacing in the correct positions.

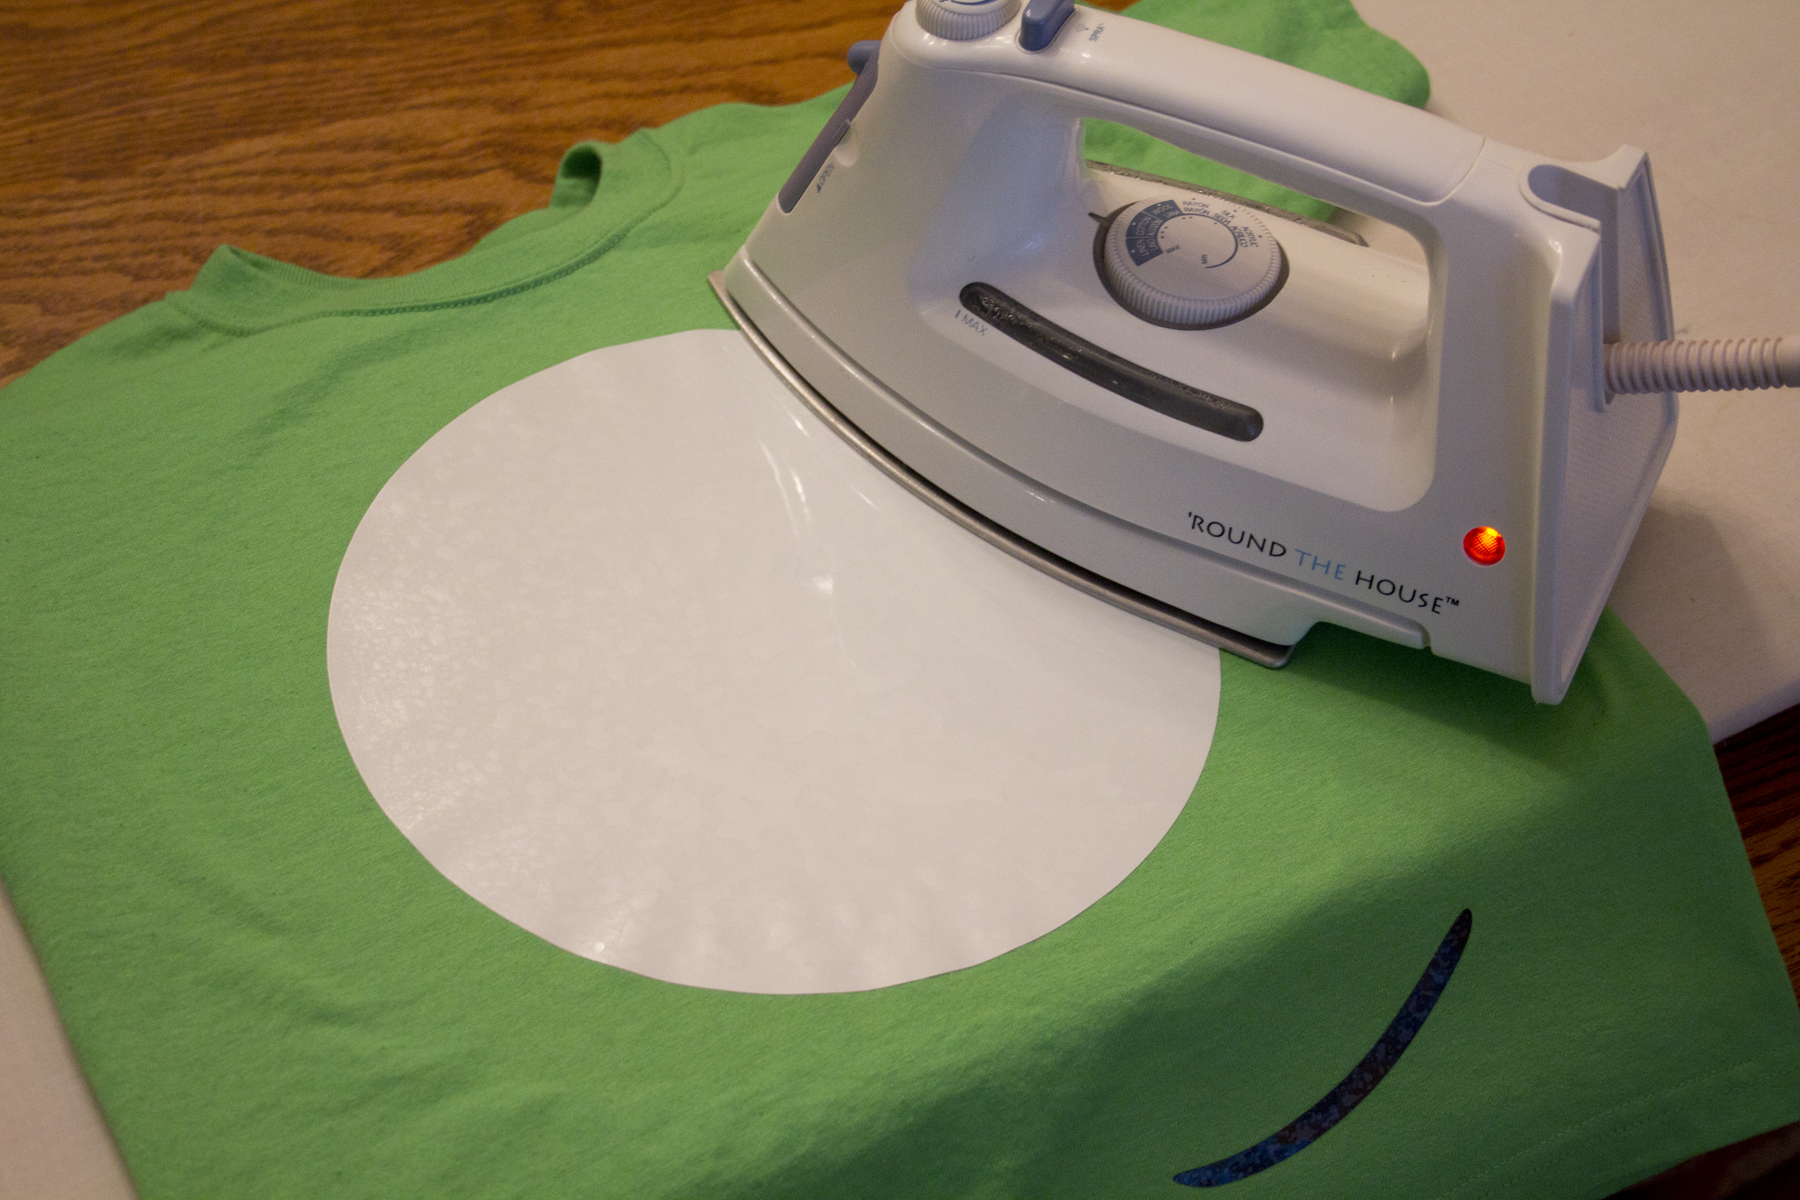
place the transfer tape, sticky side down on your design. it won't mess up your vinyl because the heat transfer vinyl has a protective layer on it. then i turn my cutting mat over and slow peel the whole design off the mat. then i take the design to the ironing board. my iron is set on a cotton setting with NO STEAM. that's very important. i iron directly on the transfer tape. when you peel it off the shirt, it take the protective layer of the heat transfer vinyl off with it. i also don't move my iron back and forth, i first let it set for a few seconds in one section at a time.


the transfer tape takes up many of the protective covering. you can see in the upper right corner that piece didn't come up. i use my fingernails to peel that piece off.

the protective covering is stuck to the transfer tape.

then i place the second layer on top of the first layer. then i iron that in place, the most important step here it to iron with wax paper or parchment paper covering your design. if you iron directly on the design without the parchment or wax paper you will melt your first layer to your iron and that's a bad thing!

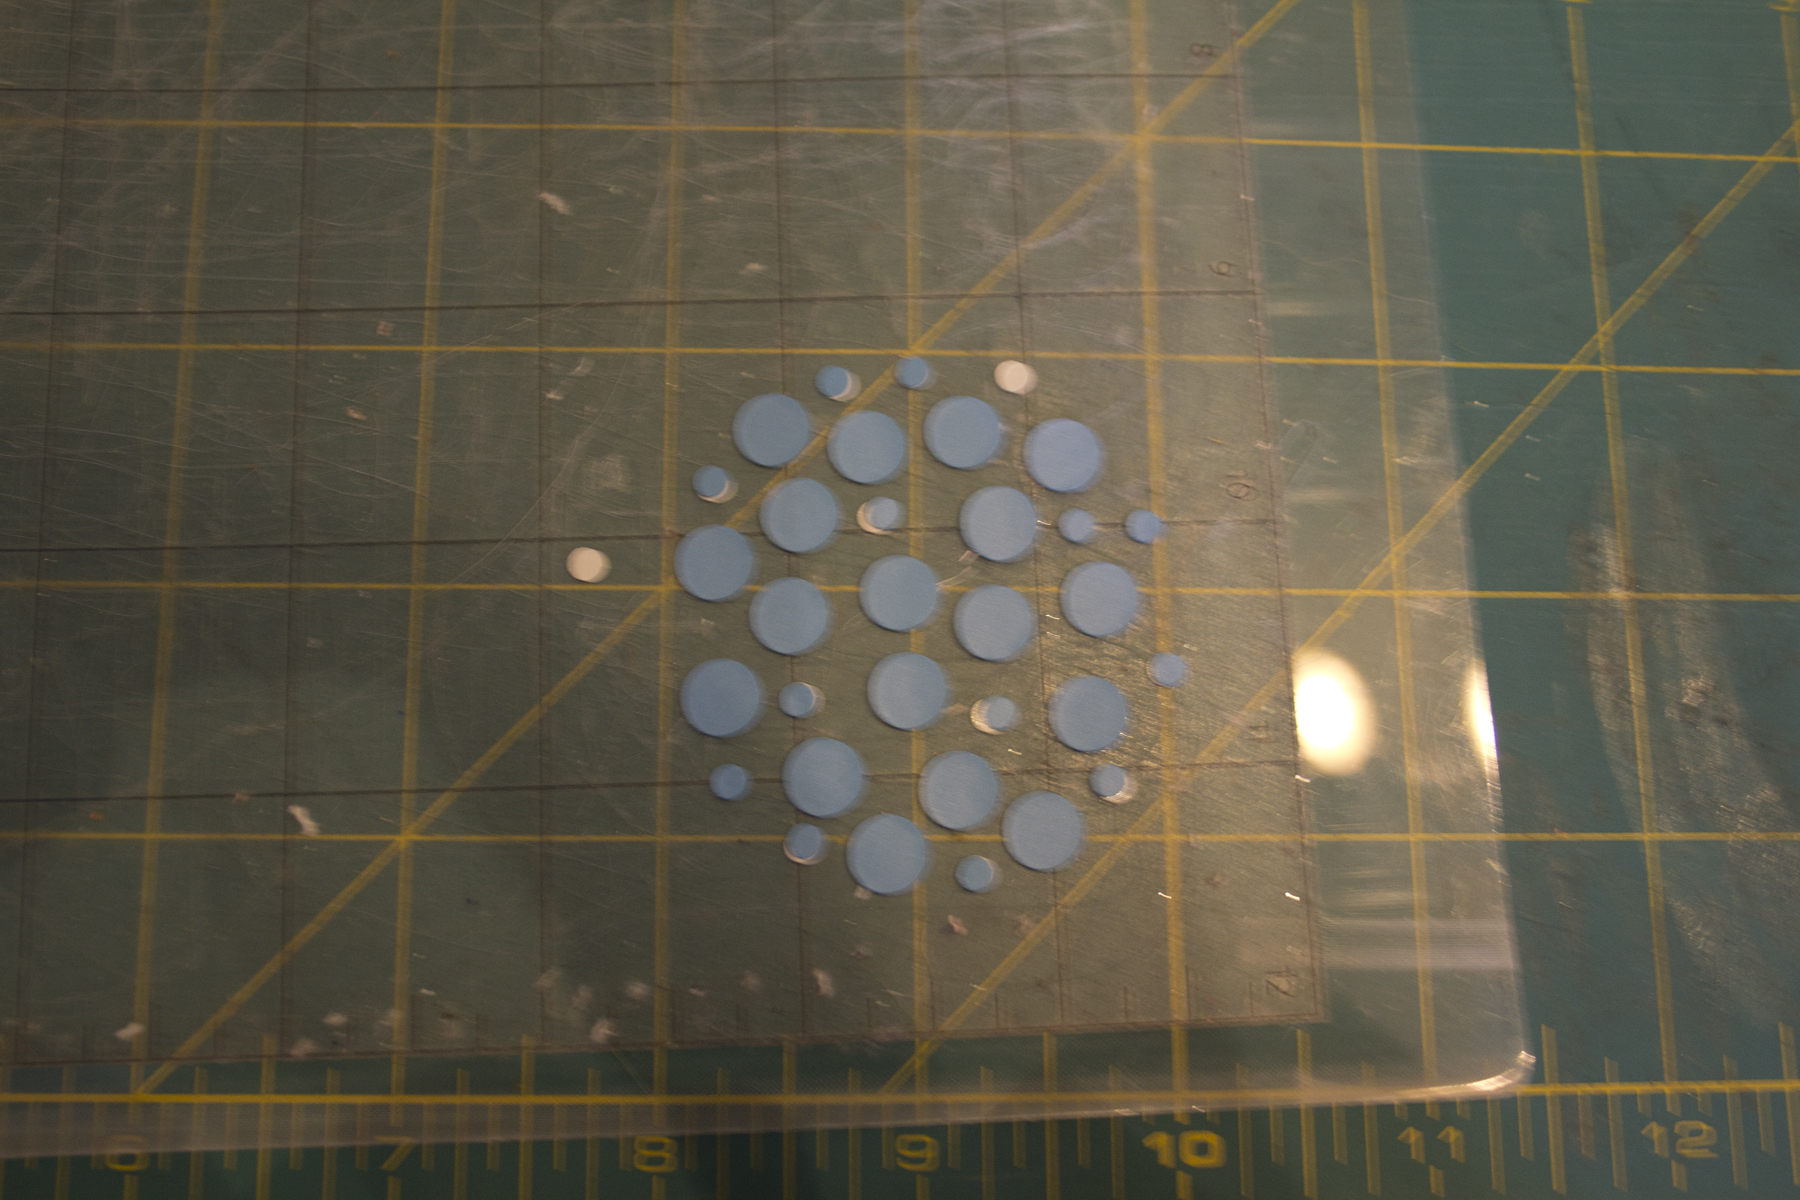
next came cutting out the swirls. because they were small and the swirls were tight the silhouette cameo didn't like my idea as much as i did. in the end i didn't want to keep wasting and ruining my vinyl or i ended up cutting them by hand and i decided to not make as many swirls.

i set the swirls and then using my parchment ironed them in place. once i placed them all that finished the back shell design.
once the backs were done and cooled, i started the front designs.

again, i design the whole look in illustrator and then divide them up by color.
here are the pieces broken apart in colors in silhouette studio.
i used back for the pupils and the mouth. for the chin, i used whatever the base color for the bottom layer of the shell, i consider that to be the true color of the turtle. i used white for the eyes and then used the traditional TMNT colors for the bandanas for each of the turtles.

in order to correctly make the eye, i original cut them as ovals. then i lined them up on the bandana and cut them with scissors so they would match up perfectly. in the picture above i am placing everything and then cutting down the whites of the eyes.

use the parchment paper to place and iron down the eyes.
as a small detail i put the initials of all the turtles on the sleeve. you may notice that there are no weapons, i debated on adding a small detail of weapon to the other sleeve but since my boys are young i decided i didn't need to add it.

final front designs

final back designs
so that's it, finished the shirts. i like the way they came out. so now you know how to work with laying the heat transfer vinyl and how to make your own TMNT shirts. if you don't have the time or the means you can also order these designs on my etsy store.
south carolina beach trays
time to break out the trays one more time for the summer. this time we are headed for the BEACH. of all the trips we have done this summer, this is the one that i am most looking forward to. the beach is where i can truly relax. it's not a very crowded beach, i can sit in a chair under the umbrella, read and still be able to keep an eye on the boys. the boys love the pool at the cond. it has a lazy river and a sinking submarine that is in the shallow section. each annual trip to the beach as the boys get bigger, gets better, things become even more relaxed and we have no timetable or plans ahead of time. we wing it. litchfield, sc here we come!
the trays have held up well with all the travel. after the FL trip they came home with crayon on them. after i peeled back the design i was them off with a magic eraser. once clean we were ready to roll again.


this sc design is the last one that i am partnering with expressions vinyl on. i have had so much fun working with them over the summer. they have amazing customer service and a fantastic product. i have been nothing but happy working with them. you can see some other designs that i created with their products on my etsy site.
we actually are going back to FL and disney in the fall, so i wanted to make sure that i was able to save the FL design. using the transfer tape i was able to peel back the design and save it. the first thing you do is cover the design with the transfer tape, burnish it down and slow peel it back. you have to use some tools or your fingernail to get it started. once it clings onto the tape you are in business.


work slowly and from a strong edge
cover with the back of the transfer tape and store. i tape the edges so that it stays flat.

after the design is off, i cleaned the tray, wiped it dry and was ready for the new design. because we are staying in SC, i decided not to carry on the state design, instead i went with icons of all the things that we would do and see while we were at the beach. it's a good idea to save your working files in the silhouette studio application, that way you aren't redrawing similar things. for example, i used the alligator and house that made for the PA tray again in this design.
i started with the house as the hub of the design.

remember to use the transfer tape when you have multiple pieces.

after the house which i reused from the PA tray, i got to work on the second most important feature, the submarine at the pool. the boys absolutely love to play there. it's a yellow sub with a fun color scheme. although, it's yellow in the design i used green so that it would stand out again the yellow tray. here's a little insight on how i make the icons. i first start off drawing in illustrator.

once i have it drawn out the way i like it, i "save for web or device" this gives you the option then to save it as a .png file which is what the silhouette studio application wants.

once saved as the .pgn you can then open it in silhouette, trace it, size it, and cut it. pretty simple after you figure out all the steps. no one ever taught me how to do any of this, it's all been trial and error.
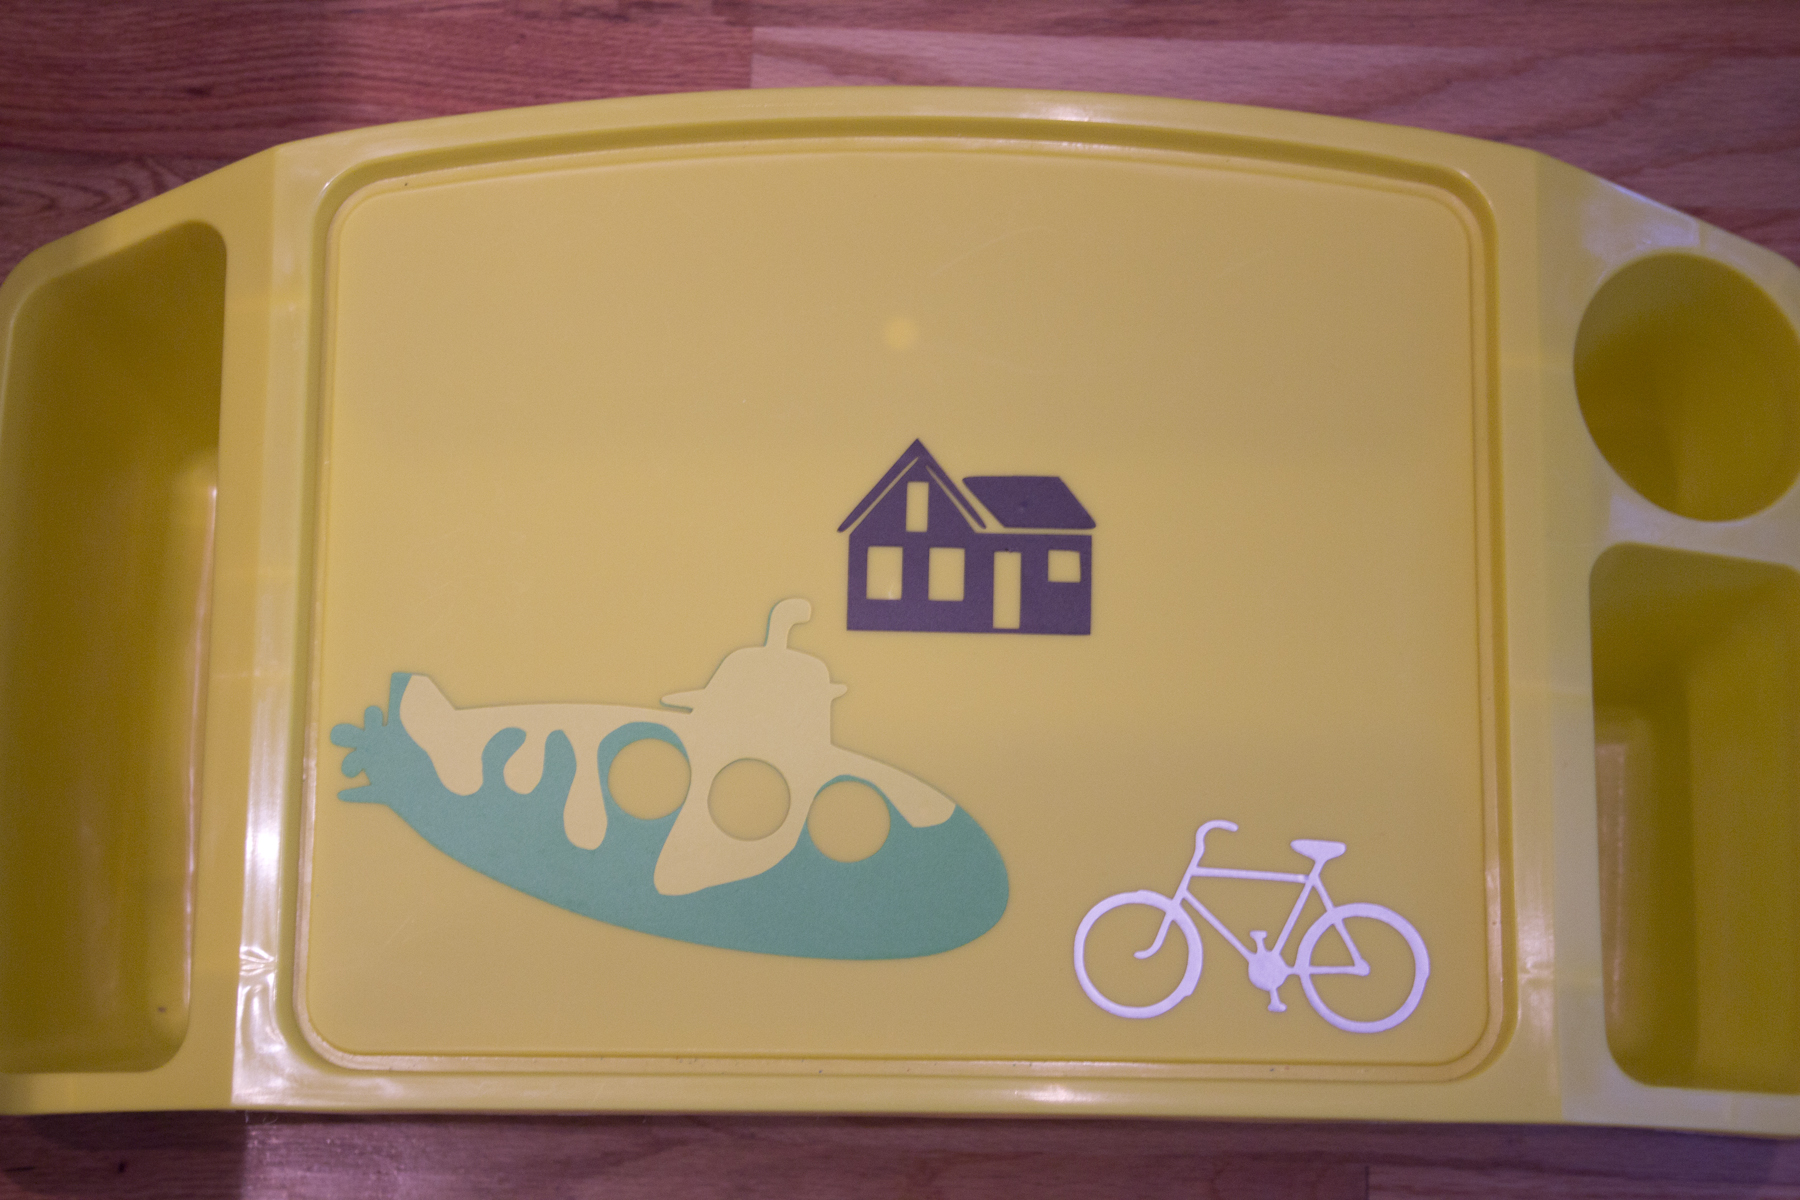
next i worked on the bike, it's definitely a favorite activity on the beach trip. we ride down to huntington state park and see all the birds, alligators, the historical house and beaches. it's so amazing. with the bike icon i used silver (metallic). it's one of my favorites. gives a design some pop.
next up was a stylized golf ball. this is something new on our trip. we played last year but with the boys another year older it will be even better. i used all circles to create this. so easy to do.


perhaps a bit difficult to see but all the small dots are held into place with the transfer tape, lay that on top to of the larger circle and you have a golfball.

then i added the red bucket and shovel. it worked out well since the negative space has a yellow background, it looks like sand.
i then recycled my alligator from the PA trip and added that on.

this year we are doing something new. we are going on a dolphin watch. this makes me a little nervous. the boys are so little compared to the great big ocean. but they are super excited so i am not going to let my fears scare them. there is also no guarantee on the sightings. this company, Blue Wave Adventures do not feed the dolphins or chase them in any way. so seeing them seems that much more special. kudos to them for understand that wild animals should stay wild! even when it might mean unsatisfied customers.
i added a dolphin and some recycled waves from the FL tray design. that completed the design for the beach trip.

it's a fun tray, something new and different to entertain the boys on this trip. i also filled the pockets with beach related color pages and word finds.
i hope that you have enjoyed the summer tray series. as i head back to school myself, work here usually slows down but i hope to keep sharing projects with you throughout the year.
3 for $20 back to school special on etsy
i'm offering a 3 for $20 special at my etsy store on the sandwich/snack bags. you choose the fabrics. come and get 'em! new frozen and avenger items added.
florida travel trays
it's about time to pack the car again! thankfully this trip i am not driving alone with the boys. they did amazing last trip. our drive back to SC from PA went from a 9 hr drive to an almost 12 hr drive. still they did great. i couldn't wait to get out of the car.
this trip, my hubby get to go to a conference in orlando and the boys and i are tagging along. we get to have fun all day while he works all day. way to take one for the team, honey! the boys have no idea that we are going to disney.
the travel trays to PA held up great. d pulled his text off before we even left the driveway i think. but lesson learned, it was too thin, it didn't have enough surface tension so it didn't stay put. they used their trays for their games, iPad, and snacks. this trip, the "pockets" of the trays will be filled with all kinds of fun disney related things.

so this blog is to show the change over of the locations. my main focus is how to save the old design with the transfer tape from expressions vinyl. i get to team up with them again on this project. (BTW, they have gotten some new items products, like holographic heat transfer vinyl. i ordered some this week and i can't wait to play with it when it arrives.)
i started by cutting the transfer tape larger than my PA map. i peeled it apart. the sticky side has the grid on it and the back is slick. don't through away your backing paper.

once apart, cover your original artwork and burnish the tape down, this will have it stick to all the little items and put them up.

then pick a side to start working from. i chose to save the type side for last. the reason for that is because the typography has less surface space is more likely to rip, it's the weaker side of the design so with more of the design pulled up on the tape from the other direction it will help the typography stay intact. you may want to use some tools for the pulling up. i used my fingernails, a brayer and a small crafting spatula.

in the beginning of the peel up you may have to help the design stick to the tape, once you get working you won't have to do that anymore.

and then you get to the other side and keep peeling.

in the image above, you can see the peel off is not perfect but this is what i really enjoy about working with vinyl. it's pretty forgiving. so i pulled up the corner and straightened them out. also you can see the counters to the letterforms didn't pull up either. so using my tools i pulled them up and flipped them upside down and placed them down on the tape.

* please note, what appears to be wrinkles in the design really is not. when you pull the tape off it's backing it wrinkles and when your design is then places on it, the lighting makes it look like the wrinkles are on your design. it's not.

once i have it all peeled off, smoothed out, counter letterform replace, i smooth it down on the backing paper of the transfer tape. you can see that the corners of the tape peel up. i used a little bit of scotch tape to keep it all together. i store mine in a flat file with something heavier on top of it.
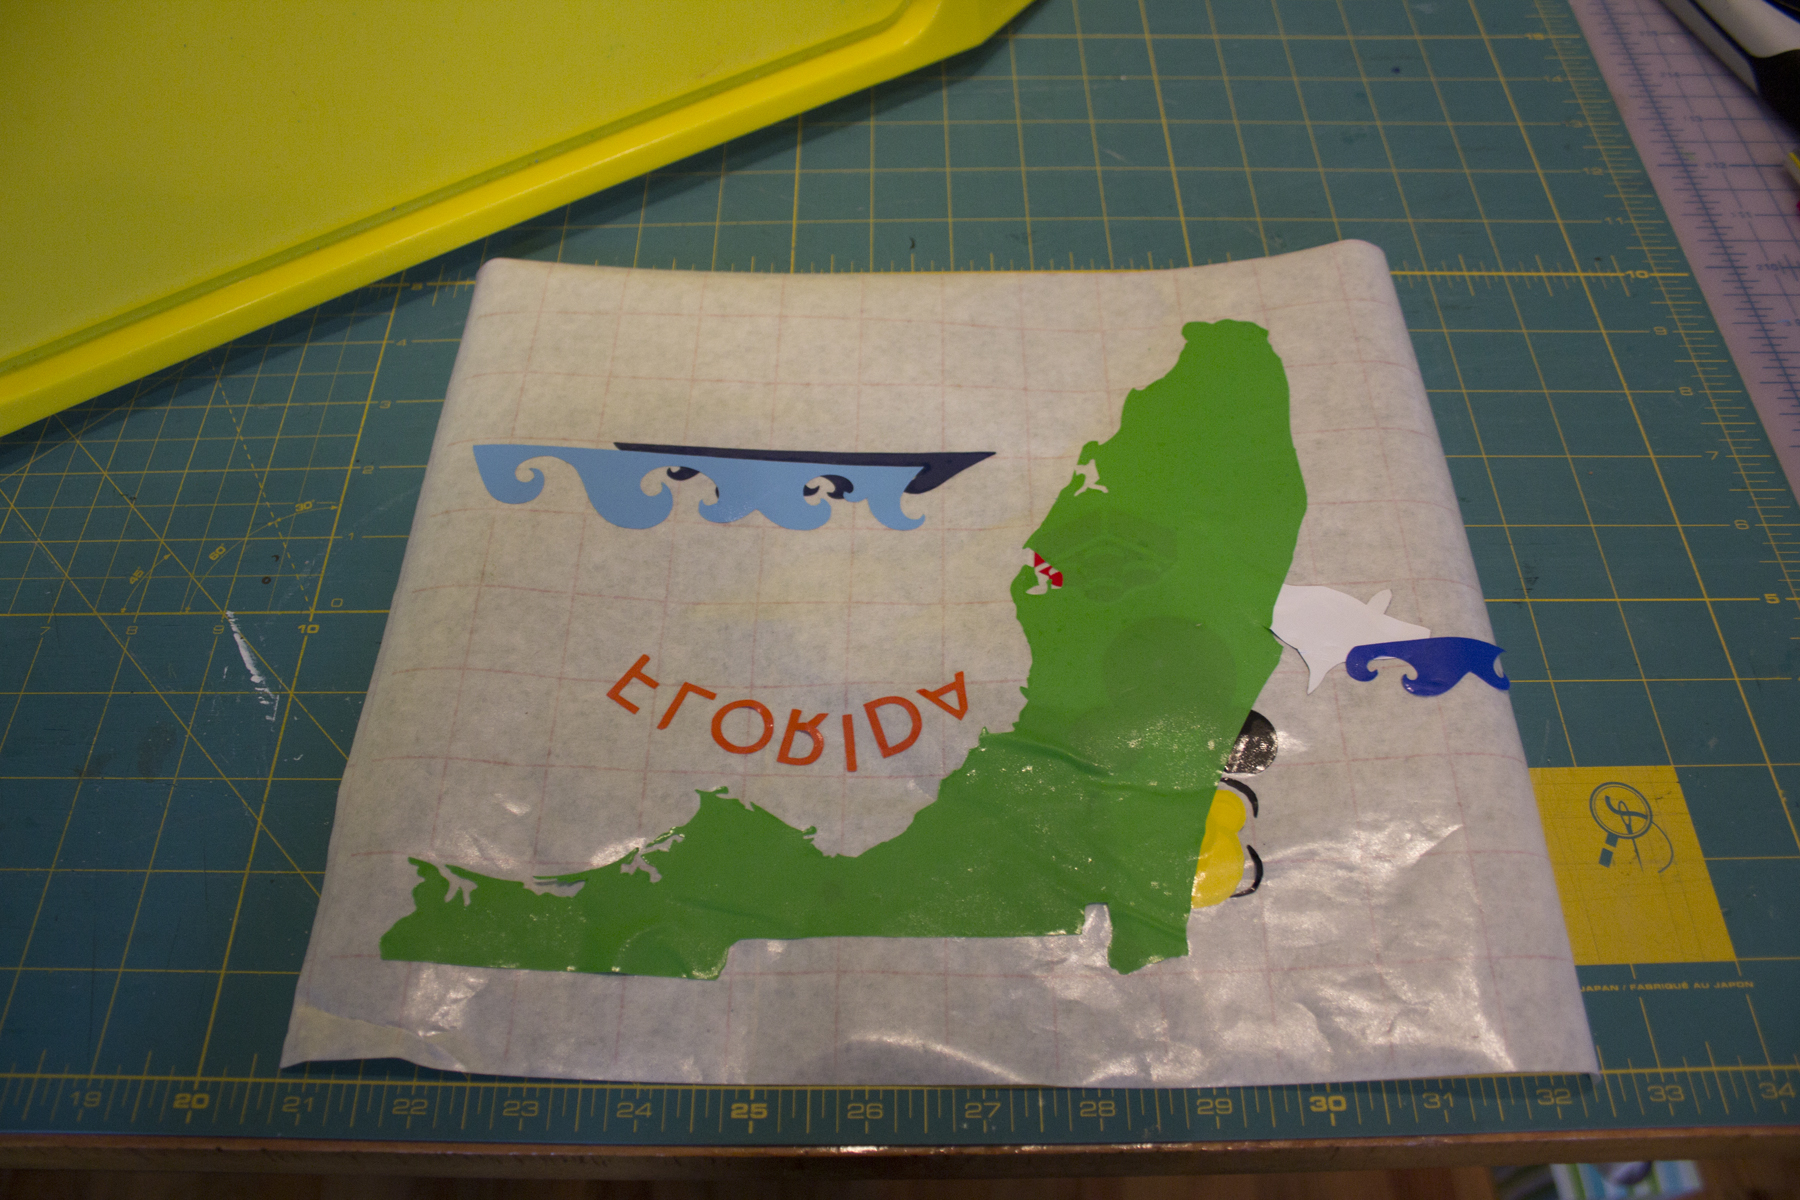
ok, moving on… the florida state design. i am not going to go into a huge amount of production detail on this one because i did that in the original PA state design. you can go back and reference that post if you need a refresher. the steps are all pretty much the same until we get to the popcorn icon.

cut the silhouette out of florida on the silhouette cameo.

marked the capital.
then i start making my icons, we are going to see the mouse, of course, sea world, and legoland. my boys don't necessarily know the logos for any of the places we plan to visit. they do know the icons that i created as those places though.

in the creation of the lego, i used a positive/negative effect and because of that design used the transfer tape to keep all the pieces together. once it's cut, i flip the cutting mat upside down to help peel it off onto the transfer tape. then i remove the backing paper, flip the icon to the correct orientation and then place it on the design. once placed, i burnish it in permanent place.


the next icon i worked on was the popcorn. popcorn? you may ask. well, it's only the best popcorn in the world! i was introduced to it by my friends, tracy and carla on our first trip down to disneyworld for our race. it's peterbrooke chocolate covered popcorn! i believe the first one we hit is in jacksonville, FL. so we will be stopping! POPCORN! yes, my boys know it because every time since that first race trip we have stopped and i have brought some home for them.
the popcorn icon needed to be outlined, against the yellow tray with a yellow vinyl it would have lacked detail. i first drew the popcorn with motion lines and the outline. i could have then divided the colors and cut the yellow but i decided that i could cut it by hand using the outline as the guide.


after this step i place the outline popcorn down on the yellow vinyl and cut around the outline with sharp scissors. then i placed it all down on the design.

after the popcorn, i created the killer whale to represent sea world. i used the same method as i did for the popcorn. first i cut the black shapes and placed them on white vinyl then freehand cut the white vinyl to finish the shape of the whale.


i finished up the design with the word "florida" and some waves, to help the boys see where we are going geographically. i made the word much bolder in this design hoping that it won't be peeled off again.


here it is, the final tray! now to fill it up with goodies. i found adorable mickey mouse cups for the cup holders, all kinds of disney activity books for the pockets and they each get a pair of mickey mouse crocs.
thanks for reading! have a magical day!
*i will be adding a few more images to this post as i get everything finished but i made some great new clothes for the boys, avengers and star wars as well as some new mickey items. don't forget to check out my etsy store. you can also get these tray designs there.
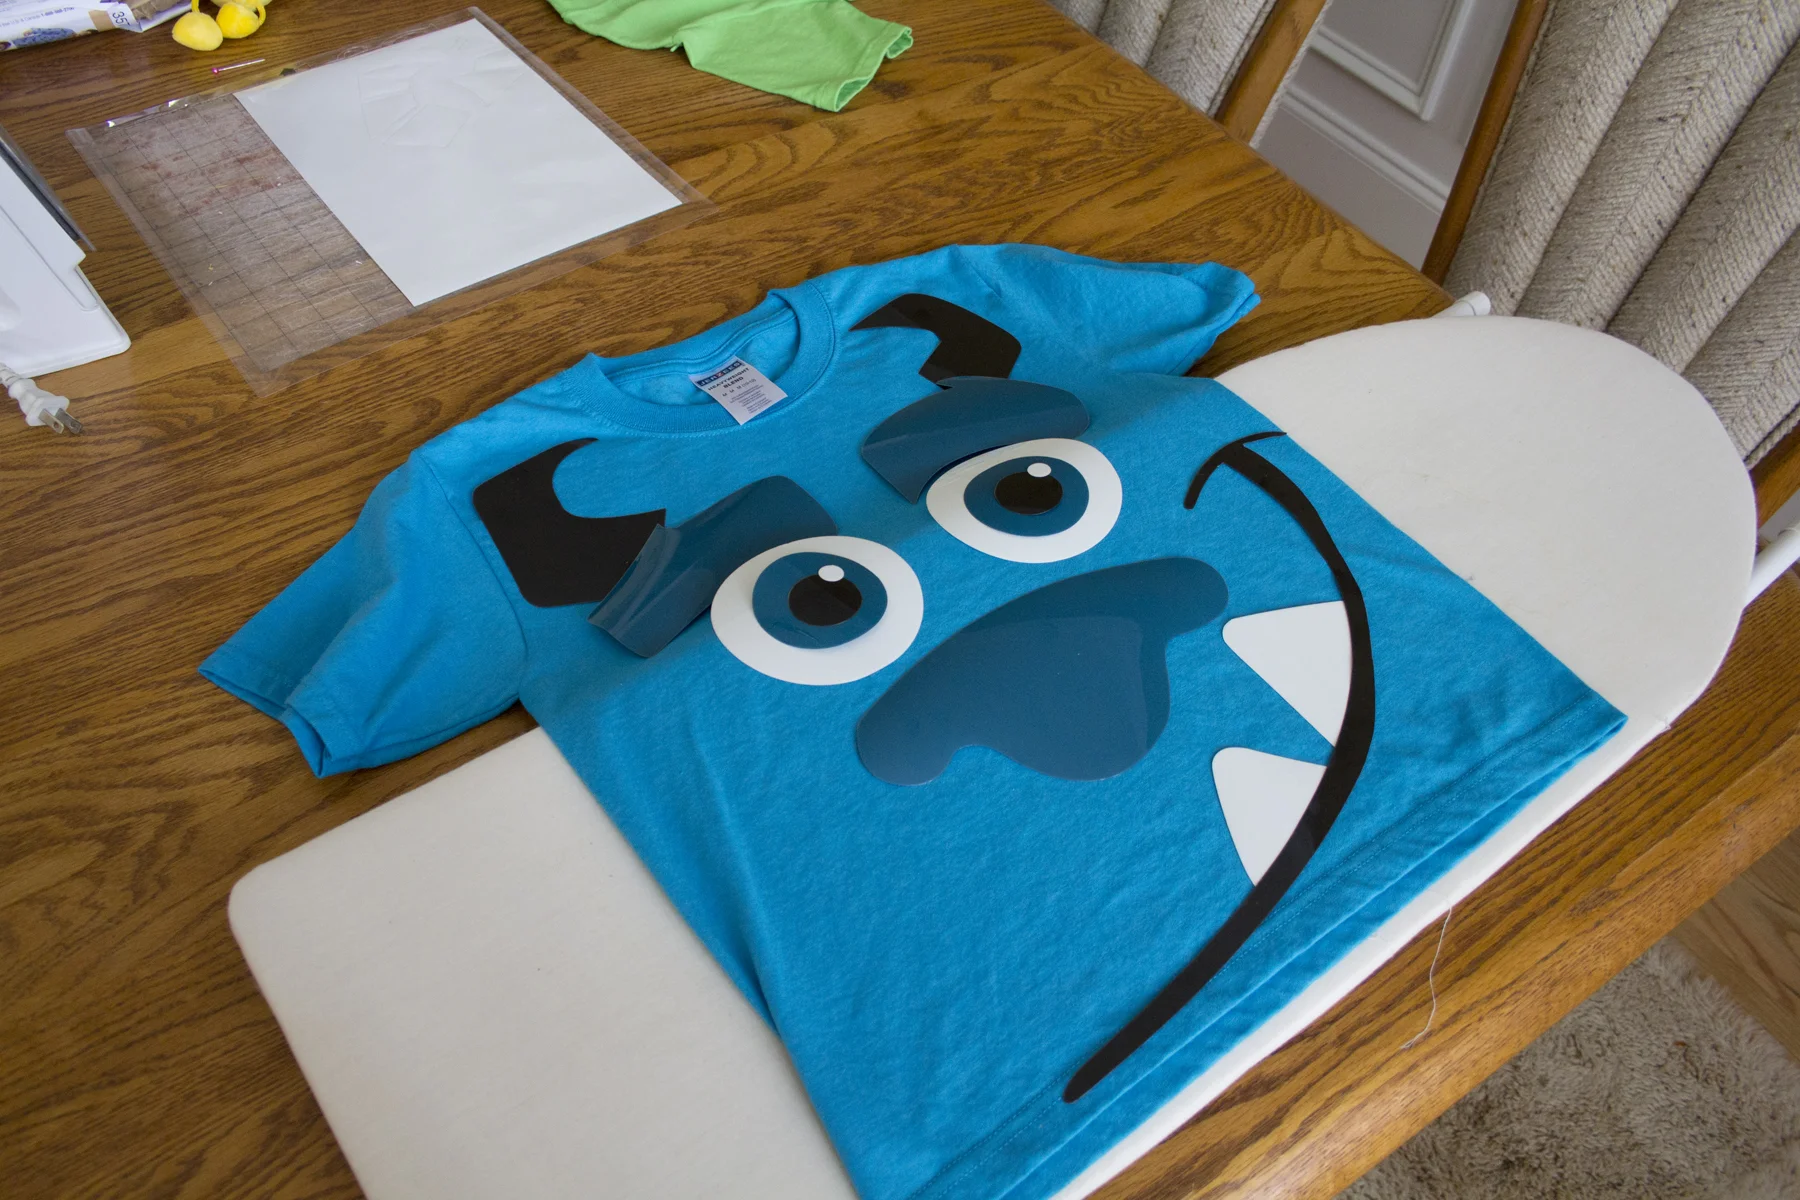
mike and sulley t-shirts
mike and sulley are two of my favorite pixar characters. with our upcoming trip to disney i decided to make t-shirts for the boys and again collaborate with expressions vinyl. they rock if you haven't checked them out yet, you should.
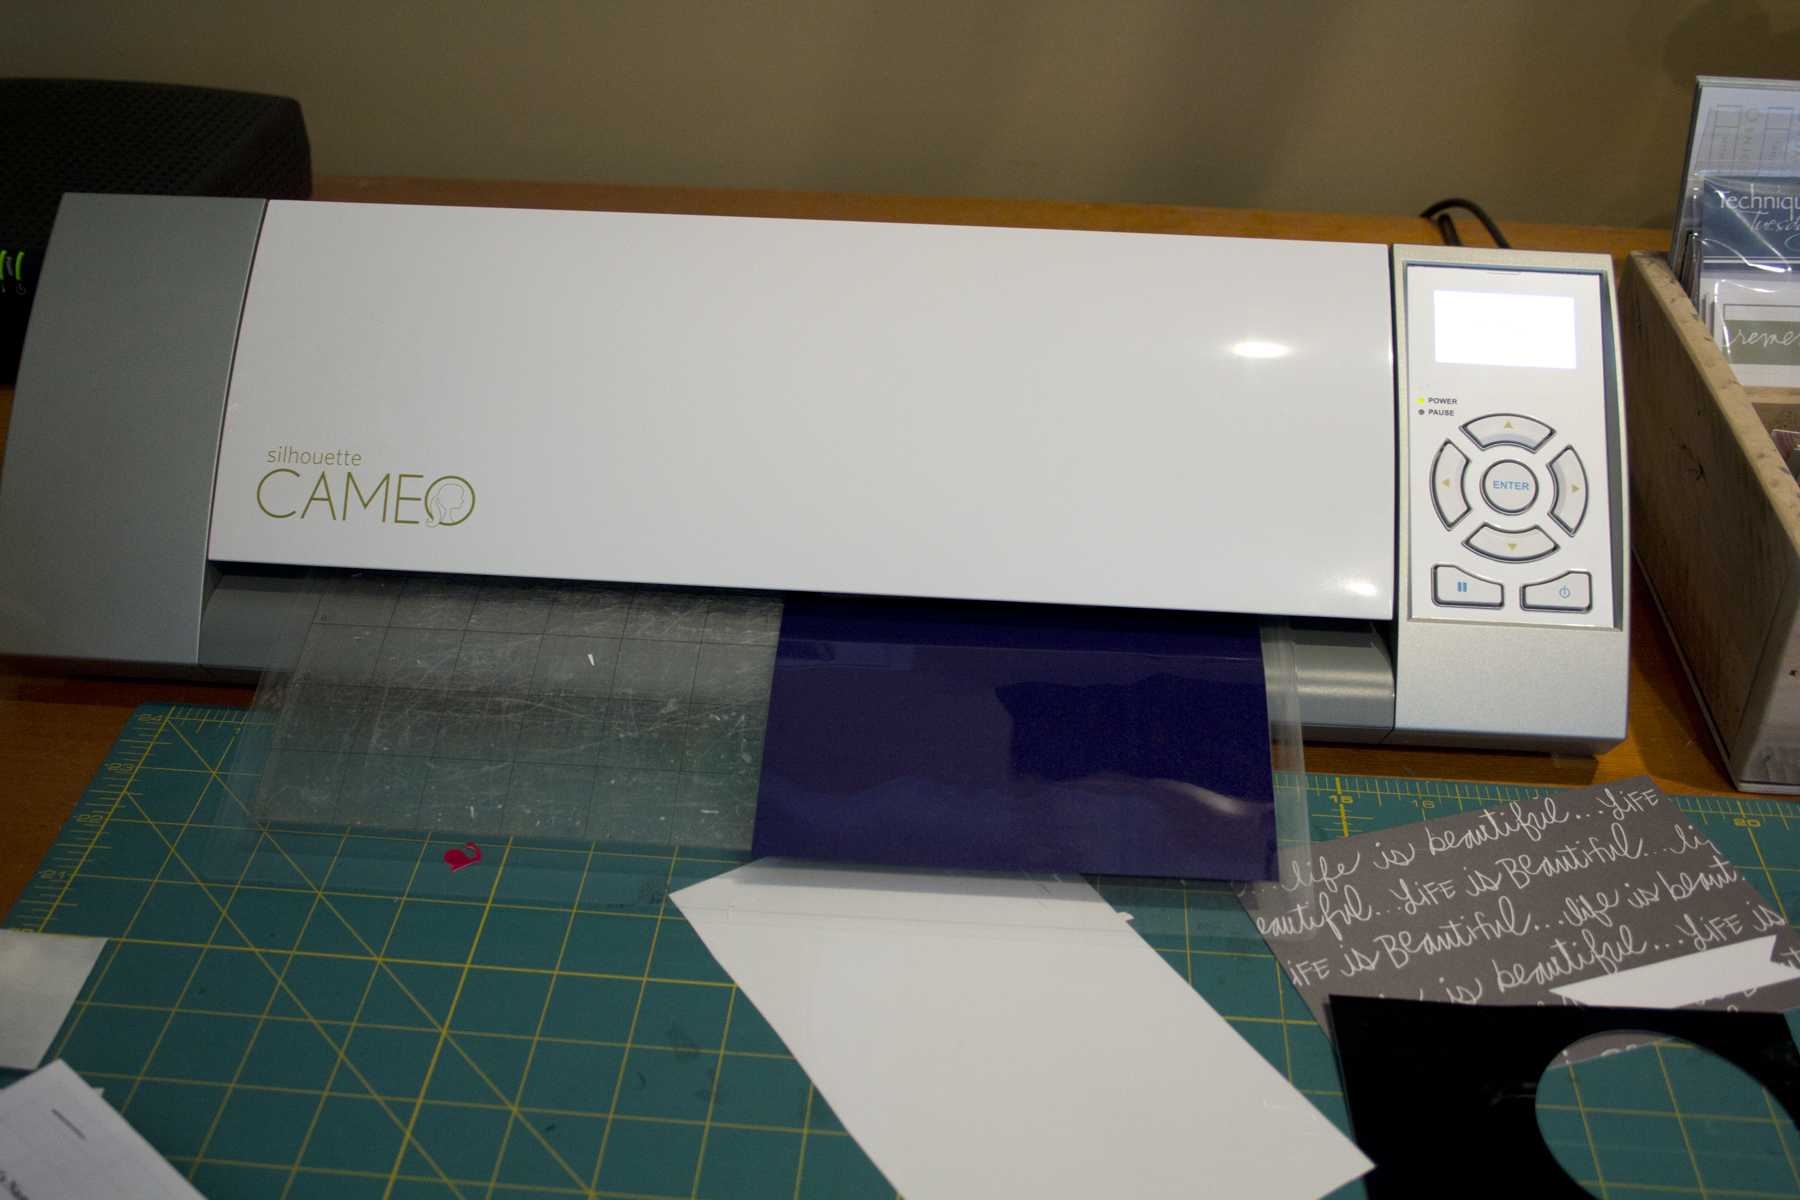
i first started out with mike and sulley like colored t-shirts, jeerzy t-shirts to be exact that i purchased from, they often run a 4 for $10 special, i like to stock up. like with many sewing projects, i feel it important to pre-wash your t-shirts. personally i just feel like the vinyl holds better to them in the long run. you would want to purchase heat transfer vinyl, easyweed, from expressions vinyl for a project like this. although, i use a silhouette cameo for my cutting, i believe that you also do this project completely by hand (drawing and cutting). for my drawing i use adobe illustrator and for drawing and cutting i use the silhouette studio software.
like i mentioned these shirts are for my boys. my oldest is 6 and but really he's a giant, so he gets to be sulley. my youngest is 4 and basically he's a smart@*$ so he gets to be mike wazowski.
in working with heat transfer vinyl and layers which is what i did to create these shirts, you have to think about some color separation on or building up from the button (the plain shirt). my first steps were to study images of both characters and boil them down to be flat graphic colors. i also want to be accurate in what i drew. for example, many time i saw sulley horns drawn in black or blue, but really they are white, tan or grey. so i watch part of the movie and then i search online.

i started off with sketches and worked in illustrator. what i created looked like this. a sulley, a mike and mike's scales down his back. i knew i wanted that shirt to have something on the back as well. i wasn't sure about the overall look for mike yet so i started with sulley.
if you saw my first "travel tray" post, you would have read that i draw in illustrator. i do this mainly because that were i am most comfortable, i've been working in illustrator for almost 20 years (ouch!). i know how to convert the files to .png files and then how to trace them in silhouette studio to have them cut. i took all the same color features and cut them out.

this is what my workspace in illustrator looked like, the eyebrows, the iris and nose were all the same color. i ganged them up on one sheet and will cut them all at the same time. this saves time and money. you can see the outside of my artboard has the other pieces already ganged together as well. once i have everything in place i save that file as the .png. then i open it in silhouette studio and trace it. it looks like this.

once i have done that step for each color, i set it on the shirt for placement. you will note that with heat transfer vinyl there is a shiny side and a dull side. the shiny side goes up (facing you). it has a plastic film on it that you peel off after it's been ironed in place. your iron should be set to a no steam setting and i set mine for cotton.
here all the pieces are loose and able to be moved around. i want to make sure i like the design before i make it permanent.

i placed all the other layer pieces to the side and was ready to iron down the bottom layer. here is an important tip. let the plastic film in place until you have ironed down all the pieces. once the film is off if will melt on your iron. once all the pieces are in place, i then go back to iron over all of it again to warm up all the piece. the film comes over better when it's warm.
**tip, you know vinyl is "stuck" when you see the plastic film has bubbles under it. it means the vinyl has adhered to the material and not the film any longer.
*** tip, i have found it is better to not actually iron the vinyl. i rest the hot iron on top rather than moving it back and forth. i then pick up the iron and move it over. this is especially helpful with small objects and corners.


now we are ready to build some layers. i started with the horns. the white pieces are now laying on top of the black, not ironed down yet. (my favorite part of this project is it's surprise. all the white is actually glow-in-the-dark white. so during the day at the park, it will appear white, until we ride dark rides or the nightly parades. my 4 year old is obsessed with glow-in-the-dark so i know he will be thrilled. )
this part is essential! you have to iron your layers with something covering all the vinyl. IT WILL STICK TO YOUR IRON AND RUIN YOUR PROJECT IF YOU DON'T! i unfortunately learned that the hard way many moons ago. so i use parchment or wax paper when i iron. you could also use the transfer tape but my thought is… why waste it?

once in place you then can peel off the film. then i just kept moving on. place, cover, iron, peel.

you can see here the film is still on the nose. even though the nose was on the bottom layer, i didn't take it off in order to protect it and not accidentally hit it with the iron.

you will burn your finger tips, only hurts for a second, a more patience person could wait but not me.
the last pieces to be put down are the eyebrows. they actually cover the corners of the horns.

i ironed them into place using the parchment paper to protect the other vinyl that has already been placed.

final front design
now that the front is finished, i wanted to add sulley's scales or spike on the back of the shirt. they are purple and i just wanted to add a few. in the design world, odds are always better than evens so i went with 5 that diminished in size.

as i mentioned earlier, you can see the bubble under the film when the vinyl is adhering to the material.

final back
and we are done. i can't stress enough how important the use of wax, parchment or transfer tape is. next up is mike. he's easy, almost all circles. and i drew him all in silhouette studio software because they have a circle tool.

once i had the pieces all cut out in their colors, i placed them on the shirt before ironing in place.

remove the layers and then iron down the bottom layer.
once the bottom is in place, remove the film and place the next layer on top. remember your parchment paper to cover the white that now has no protective film on it.


and mike is done. on the back i used green vinyl to make mike's spots.
looking at this image now i can see what is about to happen. do you see my error?

aaarrrrrgh. the circle to the far right was upside down. if you look at the image you can see the dull side is up and it looks different than the others. and this is what it looks like stuck to my iron. thankful i had a metal ruler on the table and i was able to get it off before it fully melted. DON'T TOUCH YOUR IRON! (yes, i've done that too).

i recut that circle and ironed it into place. that's the back finished. we are done!

final fronts

final backs
i'm tickled with the way these turned out. my favorite part is that all the white is glow-in-the dark, it's such a nice subtle surprise.
for care :: wash and dry inside out. on occasion you will have to touch them up with an iron. if you see something peeling up, just cover it with your parchment paper and iron again. it goes right back to sticking.
don't have time to make these on your own? come visit my etsy shop and order them. https://www.etsy.com/shop/froglegstudios
thanks for reading and stopping by. please let me know if you have any questions.
shop is now back open
my etsy stop is now back open. stocked at new frozen items, custom star wars pjs and patriotic pjs. enjoy! https://www.etsy.com/shop/froglegstudios
travel trays
hi y'all (i'll get that last southern draw in before i head north).
i am so excited to announce that i am working with expressions vinyl on 4 projects this summer. 3 travel tray designs and a t-shirt design. today is the first installment and the first design of the travel tray to pennsylvania.
from south carolina, pennsylvania is an 8-9 hour drive, with a 4 and 6 year old it could seem more like 20. i am determined to entertain the boys on this trip since i will be driving.
in preparation, i made a fun game notebook, the hubby helped to make cool travel lego boxes and i designed these trays for holding all of the above plus having a surface to eat and color on.
ok let's get started. first, i work on a mac, i use adobe illustrator to create all the icons and i cut my vinyl on the silhouette cameo. the silhouette and the vinyl are all available at expressions vinyl. i use both inside and outside vinyl. outside vinyl, to me, feels heavier in weight and if often glossy where the indoor vinyl is more of a matte finish. i bought the plastic trays at hobby lobby and i know that michael's often carries them too.

because my boys are beginning readers i decided that icons would be the best way to show them where we would be traveling to on this trip to PA.
i first started by googling "silhouette of pennsylvania" to get an outline of the state. i brought that into illustrator, traced it and then saved my finished image as a .png file. that's what the silhouette studio application likes it's files to be. once that was finished i opened it in the silhouette studio software, traced it again and added the word pennsylvania down the side. i use the heat transfer flocked setting. although i was using indoor vinyl, the software suggested another setting but my personal preference is to have the vinyl and the backing be cut the whole way through.

once done i peel the backing off and apply the state to the tray surface. i line it up where i want to place it and start smoothing it down from the center out to avoid air bubbles. once in place i burnish it down with my hand and a bone scorer.
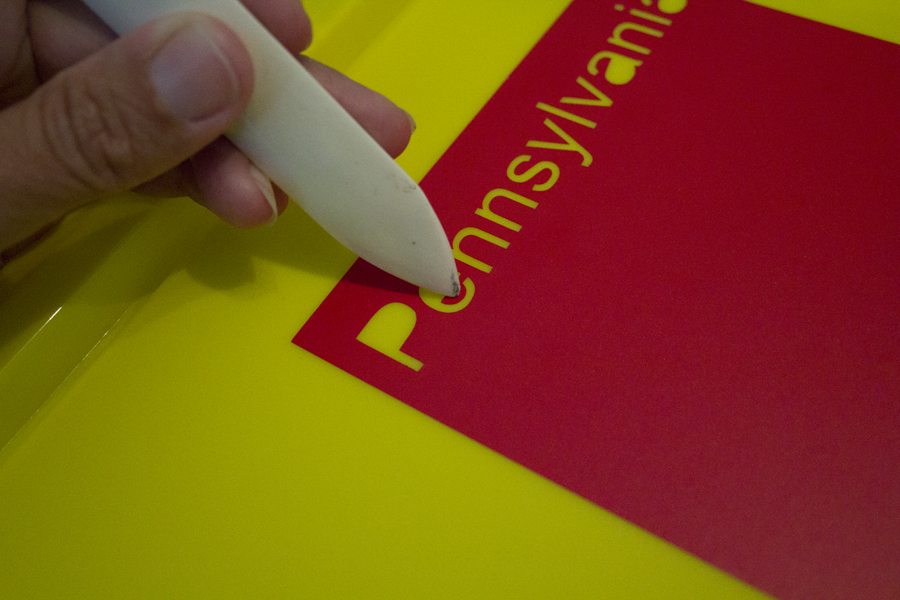
don't forget the counter forms in your letters.

next i started working on the icons. i worked on all of them in the same manner, drawing in illustrator, tracing in silhouette software, cutting them on the silhouette cameo, layering the object if needed and then placing them on the tray.
i traced the susquehanna river, cut that and placed it first.
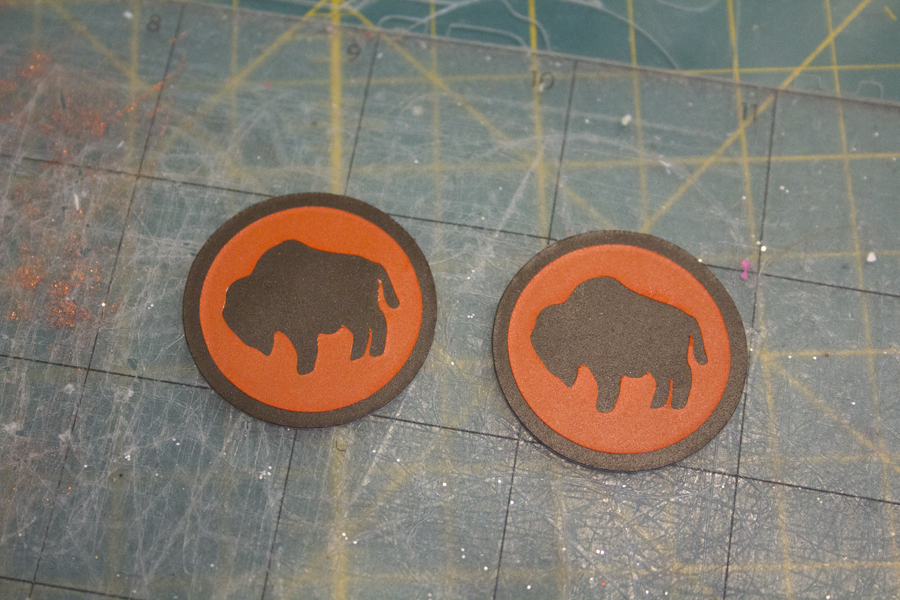
the first icon i created is for our trip to little buffalo state park. of course, the icon should be a "little buffalo." i choose to design it like a patch as it is a state park, it felt right. i used a circle and cut the buffalo out of the center and then layered it on top of the brown circle.

the next 2 icons that i created were not layered, they were single objects so they are drawn, traced, cut and placed. these icons were a star for the state capital and my hometown, harrisburg and an alligator for a day trip to reptileland

next i created an icon of a tiger for our visit to lake tobias wildlife park. this one was back to using layering affect. i first created the orange inner circle that had the tiger's face and cutting away the stripes so that the black would show through. on this one i used outdoor black vinyl. again, it's a bit glossy and i though the contrast would be a nice change.

i then layered in on top of the black and placed it on the tray. these are rough placement, i wanted to use size contrast and color contrast to keep the boys interested.
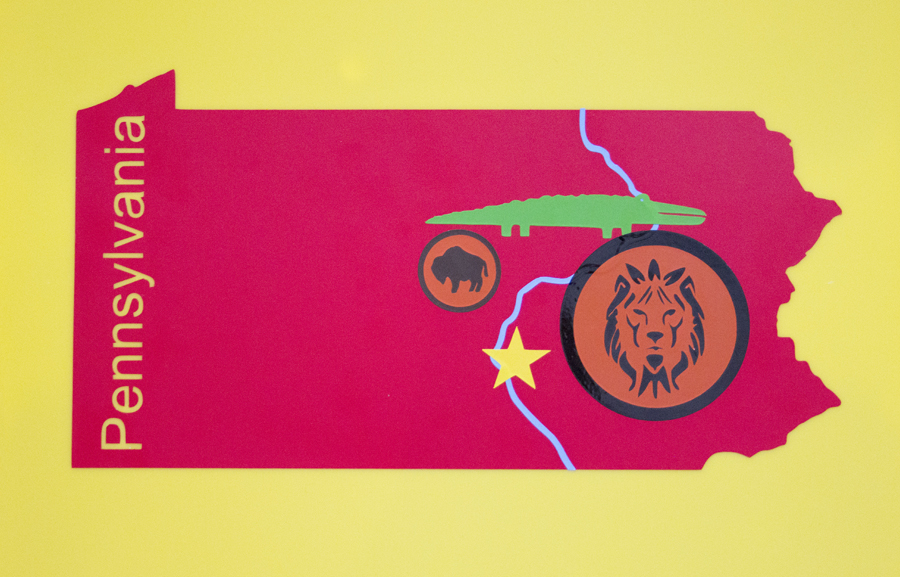
next stop hershey park. i haven't been there since i was probably in junior high. i am pretty excited about going back! for this icon, i used a hershey chocolate bar, did you know that the wrappers signify the type of chocolate? i used a brown indoor vinyl and layered that on top of the metallic silver vinyl. the very small letters that say "milk chocolate" cut fine but it was difficult to find the counters so i just left them out.

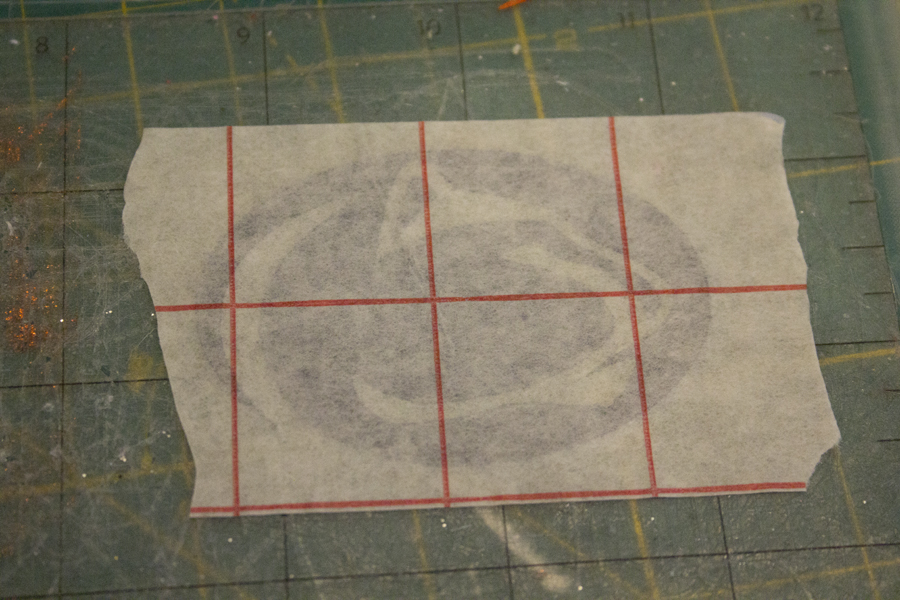
although we aren't making a trip to state college, aka PENN STATE, i put them on our map, my boys know my love for my alma mater and that's a huge reason why we love PA. someday soon we will get to take them there.
for this icon i wanted to show you the steps to layering an object. there are many personal styles to layering vinyl. i sometimes use transfer paper and sometime i don't feel it's needed. i use to mostly when i have lined up type and i don't want my baseline to shift or have to place letter by letter. i also use it when i have small pieces that i don't want to lose. i used it for this icon because the oval must line up. i find it easy to see through the transfer paper and also it's more surface space to hold on to.
first i cut the blue nittany lion out.

took away all the counter form. and cover it will transfer paper. transfer paper has lines printed on it to help you align your projects.
i then flip the mat over and pull the vinyl off up side down to help it move over to the transfer paper.
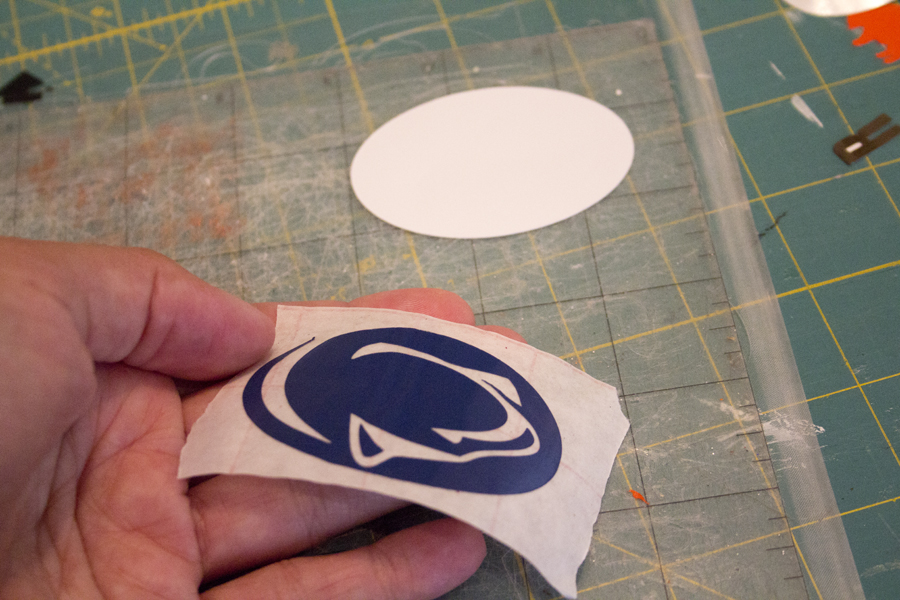
next i cut the white ovals. inverted the blue part of the logo over the white oval and burnished it into place.


lastly, you take the backing off the white oval and place it on the tray then burnish it down and remove the transfer paper (also referred to as transfer tape).

at this point, i had covered all of our major stops with icons. but i wanted to also represent that we will be visiting my dad, sister and aunt on this trip. i made an icon of a very simple house and cut them in their respective colors. i also made them very small to help with the size contrast.
i also created a cow icon, we aren't specifically stopping to see any cows but we can't make a journey to PA without seeing cows. it's placement is also close to my husband's family farm. however, we aren't stopping there and they raise beef cattle not dairy. instead of cutting the cow's spots on the silhouette i cut them by hand. that's a great thing about vinyl you can use it in so many ways.
the last step was to add a little bit of fun type. i chose to use some handwritten type by ali edwards. she has a collection called i heart travel phrases. it can be purchases at designer digitals. i used the phrase, let's explore.
below is the final product. i am very pleased with how it turned out. i think the boys will find it entertaining. i will be selling custom vinyl states with 5 custom icons at my etsy store when i am back from vacation. you can find my store here. https://www.etsy.com/shop/froglegstudios
my next collaborative blog post with expressions vinyl will be about heat transfer vinyl, working with and layering it to create mike wazowski and sully shirts for out trip to disney. after that i will be designing another tray for the disney trip and i will discuss how to "save" our PA tray design.
thanks for stopping by and please let me know if i can answer any questions!

i also wanted to briefly share some other things i found or made to help entertain the boys. all of this has made me laugh a bit, remember when you just sat in the car on a road trip? maybe when you got a little old you might have had a walkman… i found so many great things on pinterest, i may have gotten carried away.
i found many great activities on this blog http://mamapapabubba.com/2014/05/22/portable-activity-kit-for-little-travellers/ i made many of them and they will be great especially for my littlest dude. i also got some great things from teacherpayteachers. i really liked the i spy bag but i then saw a sewn version and i made one.

lastly, i saw this travel lego box on pinterest and i knew my boys would love it for sure, so i recruited my hubby to make them. he used gorilla glue to hold the fence up. i think they turned out great!

happy trails my friends.
jammie time
besides the canning i have also been making the boys jammies for the beach. i am not sure why but i felt it needed to be done : )
i made them shorts and then used heat vinyl to make the monster on the t-shirt. i used illustrator to trace the monsters on the fabric and pesto, shirt made!
more canning
oh the canning, the canning!
recently, i have made spaghetti sauce, salsa, peaches and tomatoes in water.
i looked at a lot of different recipes online and in canning books, i love the smell of an old cook book, in the end i kind of combined some and added in the things i liked. i don't really believe that in the kitchen that you have to follow all the rules. i used the sauce that i found on this site as the base from my spaghetti. thanks sherelle!
i did a huge amount of peaches in a light syrup. and i had something happen that had never happened before.
the bottom cracked right off, weird right?
canning overload
i recently went to a class at old mccaskill's farm, in rembert, sc. i knew how to can in a hot bath from years of doing that with my mom and grammy. i never knew how to pressure can and the thought of it kinda scared me. when we saw this class, my BFF and i signed up, we would concur pressure cooker canning. just in case you don't know, you have to pressure can an item when it doesn't contain enough acid. so many vegetables need to be pressurized. after the class, i went a little nuts which is why i am a little behind on the project life. in one weekend i canned 20 quarts of pickles, 21 quarts of potatoes, 6 quarts of green beans, 18 pints of strawberry jalapeño jam, 6 pints of corn and 8 pints of applesauce. it was a lot of work and i felt a little a squirrel storing up for the winter.
these were the green beans at that we canned at the farm.
we went to the big state farmers market here in SC and got a ridiculous amount of food for very little money. i had never bought a bag of potatoes before or 40 ears of corn at one time. it was crazy. my BFF and i split the cost and we only spent $50 each.
my most favorite thing that i made was the strawberry jalapeño jam. strawberry season closed this week in SC so i got these just in time. below is the recipe i used. so so good.
homemade granola bars
this weekend, denton and i were watching the food network. a show that i hadn't seen before came on and they were talking all about camping food. so we were game. it was "home for dinner" with jamie deen. he was making homemade granola bar. since i have been paying much more attention to watch is going in my mouth and the boys' i decided to give it a shot today. the outcome was great! the only thing i changed was the addition of chocolate chips, all granola needs chocolate in my opinion!
there is the recipe that i got from the food network website.
Ingredients
Nonstick cooking spray
1/2 cup honey
1/2 cup creamy peanut butter
2 tablespoons light brown sugar
1 teaspoon pure vanilla extract
2 cups puffed wheat cereal
1/2 cup dried cranberries
1/2 cup chopped pistachios, rough chopped
1/2 cup nonfat dry milk powder
Directions
Preheat the oven to 300 degrees F and adjust racks to the center of the oven. Line an 8- by 8-inch baking dish with parchment paper, leaving a 3-inch overhang over the sides to use as handles later. Spray the parchment with nonstick cooking spray.
Add the honey, peanut butter, brown sugar and vanilla to a small saucepan and bring to a light simmer, stirring until the peanut butter is well mixed into the honey.
Combine the cereal, cranberries, pistachios and milk powder in a large bowl and toss all together with your hands.
Pour the syrup over the cereal mixture and stir all together with a rubber spatula, working quickly because it will get pretty sticky. Add the sticky mixture to the prepared baking dish and pat down with the rubber spatula. Place a piece of parchment over the top and press down firmly. This will make slicing easier later on. Remove the parchment from the top after pressing and bake in the middle rack until just lightly golden, about 25 minutes.
Cool the bars completely in the pan, and then slice into 8 bars.
Read more at: http://www.foodnetwork.com/recipes/jamie-deen/homemade-peanut-butter-snack-bars-recipe/index.html?oc=linkback
chocolate strawberry cake
i recently saw a delicious looking cake from the pioneer woman's site -ree drummond, do you know her? she's awesome! it looks amazing but it was going to be on her new episodes in two weeks. so i didn't know what the recipe was but i knew i could make something that looked like hers. so here is the picture that i saw. be ready to say yum!
now of course, i don't have the beautiful lighting and professional set up but here is my cake. i made a devil's food cake, then a layer of chocolate icing, then a layer of homemade whip cream that was mixed with a little sugar and cream cheese, a layer of strawberries, then i did it all over again.
margarita cheesecake
in week 15, i showed a margaritia cheesecake, i got the recipe from good housekeeping website. it was delicious and i highly recommend it!
http://www.goodhousekeeping.com/recipefinder/margarita-cheesecake-789